Glare from lights
Lower glare compensation to reduce the glare from bright light sources. The Less glare preset changes the game’s value from about 1.33 to 1.0.
Glare & exposure
Tame bright-light glare and lift dark tones with Odyssey’s own tone-mapping settings. Start with a preset, refine the picture and keep a direct path back to the game’s defaults.
Download for Windows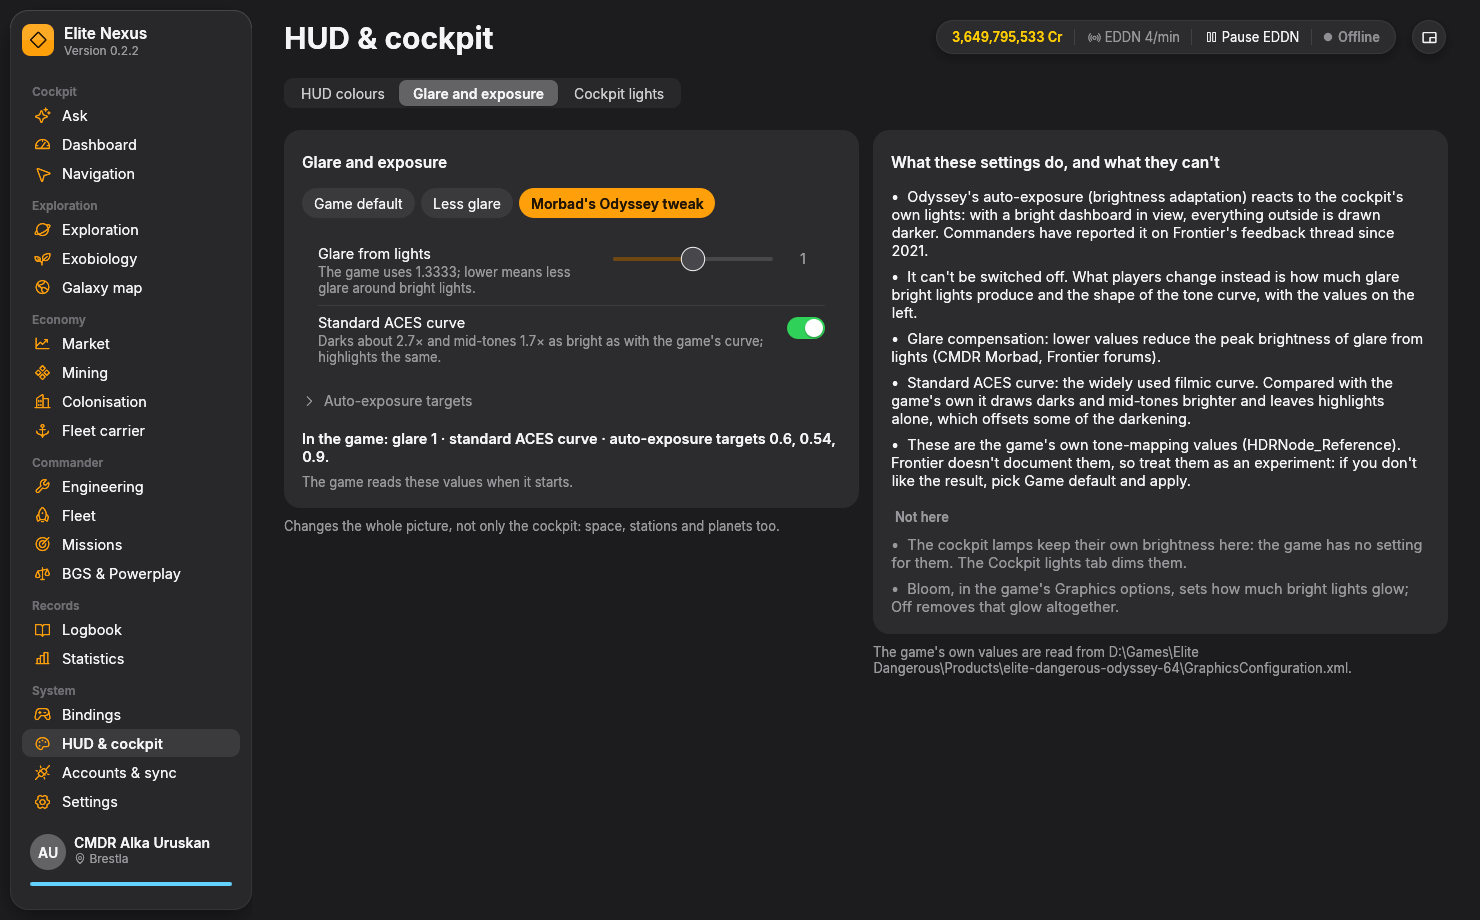
A brighter dashboard changes the view
Odyssey’s auto-exposure reacts to bright cockpit lights. With the dashboard in view, the space beyond the canopy can appear darker. Nexus puts the community’s tone-mapping adjustments in one place.
Lower glare compensation to reduce the glare from bright light sources. The Less glare preset changes the game’s value from about 1.33 to 1.0.
Lift dark tones and mid-tones relative to the game’s curve while keeping highlights similar. The app shows how the curve changes representative dark and mid-grey tones.
Open the advanced controls to adjust the three percentile values used by the exposure settings. These are global tone-mapping controls, affecting space, stations and planets.
A useful place to start
Compare a simple glare adjustment with a fuller community configuration, then tailor the settings to your display and preferences.
The values Odyssey ships with. Use this as your baseline, or apply it whenever you want to restore the game’s own tone mapping.
A focused first step: lower glare compensation to 1.0 while keeping the other tone-mapping values at their defaults.
CMDR Morbad’s 2021 community settings combine reduced glare, different auto-exposure targets and the standard ACES curve.
From preset to your next flight
Open HUD & cockpit → Glare and exposure. Start with Less glare or Morbad’s Odyssey tweak, then fine-tune the available controls.
Nexus saves the relevant values in the game’s graphics override, alongside your HUD settings. Your original settings file is kept. These controls use the game’s own configuration and need no graphics hook.
Quit Elite Dangerous to the desktop and launch it again; Odyssey reads these values at startup. To go back, select Game default, apply it and restart once more.
Complete the picture
No. These adjustments change glare and tone mapping; they do not switch off brightness adaptation. Frontier does not document these values, so treat the presets as starting points and compare the result in the scenes you actually fly through.
Glare and exposure change how the picture is drawn. To dim the cabin’s own lamps and glow, use the independent Cockpit lights controls.
Bloom is the setting in the game’s Graphics options that controls the glow around bright lights. Nexus exposes glare compensation and tone-mapping values, so you can adjust those alongside your preferred in-game Bloom setting.
Yes. The HUD colour editor has its own brightness control, together with colour and saturation adjustments. Combine the three tabs to tune the interface, cabin lighting and overall image separately.
Keep exploring
Ready when you are
Free and open source. Windows 10/11, 64-bit. Unzip and fly.