Light kept
Choose how much of the cockpit’s light remains. Lower it for a subdued cabin; raise it when you want more of the interior in view. This controls the lamps and their glow independently of HUD brightness.
Cockpit lights
Turn down the cockpit’s own lamps and glow with a dedicated dimmer. Keep your HUD readable, your surroundings unchanged, and adjust the cabin while you fly.
Download for Windows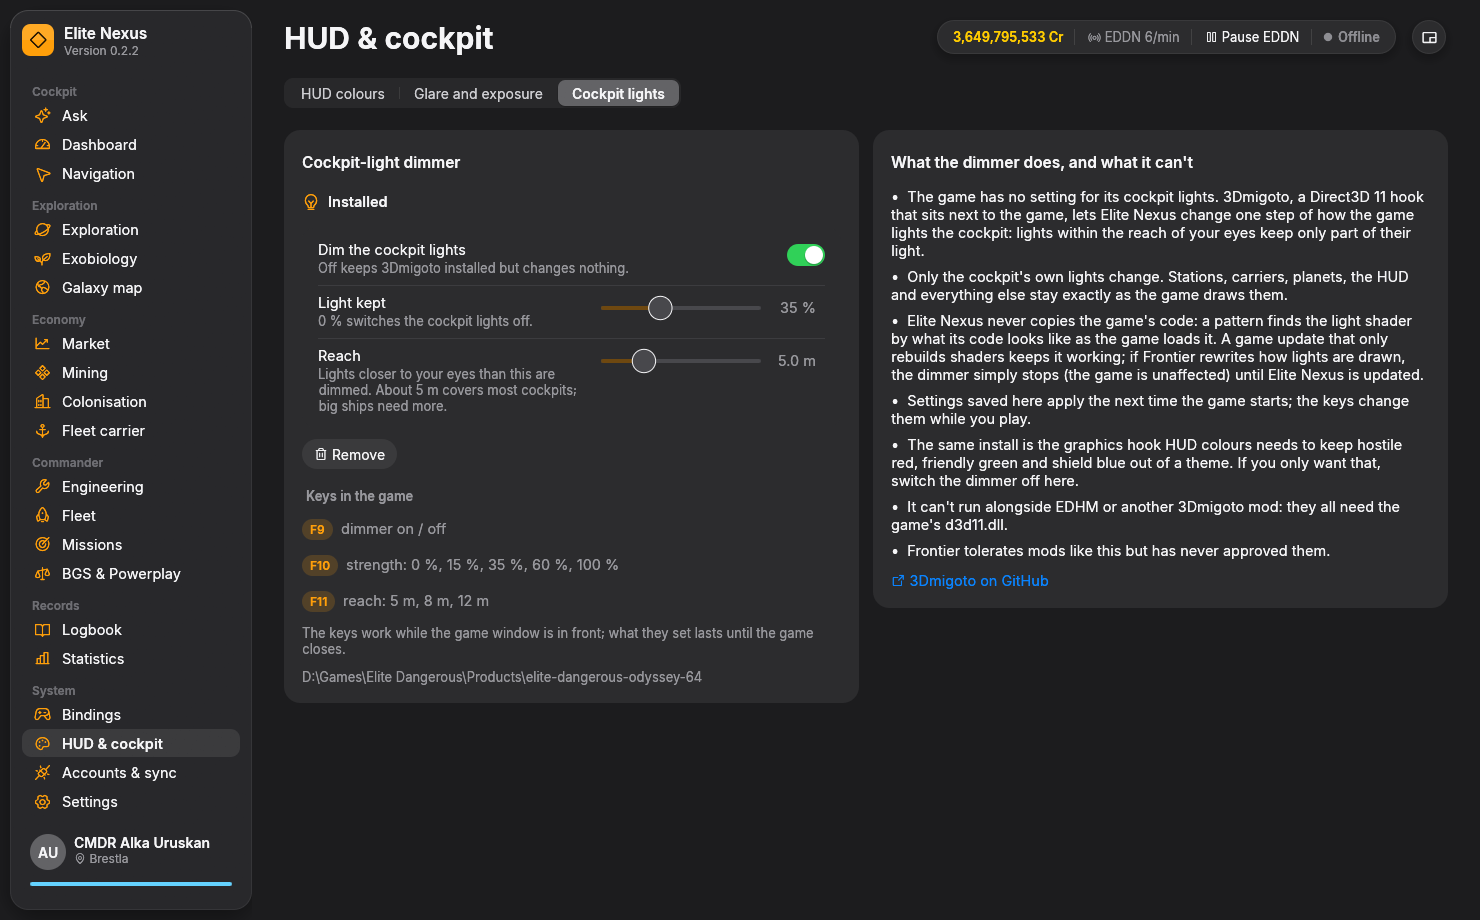
Set the mood of the cabin
Elite Dangerous has no built-in cockpit-light dimmer. Elite Nexus adds one through an optional graphics hook, targeting lights close to your viewpoint.
Choose how much of the cockpit’s light remains. Lower it for a subdued cabin; raise it when you want more of the interior in view. This controls the lamps and their glow independently of HUD brightness.
Set how far from your viewpoint the dimmer reaches. Around 5 metres covers most cockpits; a larger reach gives you room to adjust for a different ship.
The dimmer targets the cockpit’s own lights. Station, carrier and planetary lighting retain their normal appearance, and your HUD keeps its own colour and brightness settings.
Adjust without leaving the game
Set your starting configuration in Nexus, then make quick changes with the game window in front.
F9
Switch the effect on or off to compare the cockpit lighting in place.
F10
Step through 0%, 15%, 35%, 60% and 100% to find the level that suits the scene.
F11
Switch between 5, 8 and 12 metres to adjust the area around your viewpoint.
Use these keys without Shift, Ctrl or Alt. Nexus checks your active control presets and names any action already using a key, so you can resolve a binding conflict.
One installation, two cockpit features
The same graphics hook powers the light dimmer and optional HUD contact-colour protection. Enable either feature independently.
Choose Install the dimmer to review the setup. Nexus downloads open-source 3Dmigoto from its official release, verifies it against pinned checksums and installs the hook beside the game.
Set Light kept and Reach, then start or restart Elite Dangerous. The game reads the configuration at launch; the F9, F10 and F11 controls work during play.
Use Remove to uninstall the files Nexus installed. Files changed since installation are left in place. Removing the shared hook also turns off HUD contact-colour protection.
The details that matter
The Nexus graphics hook cannot run alongside EDHM or another 3Dmigoto mod. The app identifies an existing installation before setup. The hook is an unofficial graphics modification; Frontier has not formally approved it.
The dimmer controls lighting. Use HUD colours to change the interface’s palette and brightness. If you only want preserved red hostile and green friendly contacts, you can leave the dimmer switched off while keeping the shared hook installed.
Those are separate settings for how the whole scene is drawn. Glare and exposure provides presets and tone-mapping controls, so you can tune the picture as well as the cabin lighting.
The dimmer recognises the light shader by its structure rather than a fixed file identity, helping it survive updates. If a game update changes that structure, the dimmer may stop working until Nexus is updated.
Keep exploring
Ready when you are
Free and open source. Windows 10/11, 64-bit. Unzip and fly.